Showing posts with label MTME. Show all posts

8/7/13

A Pencil turned Rocket? Yep.

I have another great template to share with you from My Time Made Easy's August release. This template is called Pencil You In and, as the name suggests, it creates an adorable pencil shaped package. But I wanted to turn it into something else so I put on my creative headgear (don't you wish there was something like that? I know I could use it from time to time!) and turned the pencil template into a rocket! Take a look and then I will tell you how I changed it up.


Ok, so here is what I did - no real big changes, I assure you. I created the rocket body with the pointed top piece as the directions instruct you to. I added a simple strip of silver cardstock at the top, right where the body means the pointed section and this was added just as a little trim piece.

The bottom - or eraser section - was also constructed as the directions indicated but I left off the added strip that is supposed to look like the metal going around the pencil that holds the eraser on. Make sense?

Here's the biggest alteration - added the 2 rocket "fins". See the diagram below:


I started with a die cut oval which I cut in half lengthwise. Then I took both pieces and cut off a section at the bottom of the half-ovals so there would be a flat edge at the bottom. Finally I cut a small section from each piece as indicated by the dashed lines in the last section of my diagram above.

This left me with a little tab - see the section above the dashed lines? To stick my fins to my rocket, I simply used a craft knife and cut a slit in the side of the rocket body - one on the left and one on the right - and then inserted that tab into the slot. No adhesive was needed - the piece tucked in and just stayed put.

My last step was to add some ribbon "fire" to the base of my rocket so they would trail out from the bottom. The bottom can still be removed from the package in order to insert a gift item.

The card was made to match the rocket and the sentiment I used is from the On Display 1 digital set. Clean, simple, and eye-catching! And we always need more options for the guys, don't you think?

That's it for me today but be sure to stop by Lauren's blog for more Pencil You In ideas and be sure to check out the exciting news from Lauren below and VOTE!

From My Time Made Easy:
VOTE NOW! Help My Time Made Easy LLC Get on the Shelf at Walmart!!! FOLLOW THE LINK BELOW TO VOTE!! You can vote DAILY until September 1st. Share the link and PLEASE VOTE!


Have a great day and I will see you again soon!
 photo myname.png

8/1/13

Check out this MTME release!!

You will not believe the gigantic release going on today at My Time Made Easy! 10 - count 'em 10 - new templates! I am in love with the new State Your Case template I am showing today - here's some info about it:

Available in PDF, SVG, GSD, DXF, WPC
Completed Project Size:
5 3/4 Inches Tall
4 1/2 Inches Wide
3 Inches Deep
This is definitely a handy little "case" that will help you to perfectly package up a variety of items such as A2 size cards/envelopes, stationary, office supplies, hair care, new baby products, bath products, jams, baked goods, cooking mixes....to name a few. So many possibilities!
Now, you know I've had babies on my brain lately so I made a baby gift package and card -


I used Bringing Home Baby digital stamps and paper along with the State Your Case template. The template itself can be left without the outer "wrap" - that's the printed piece that is added to the package  - but I think it is just so adorable with the wrap - and easy! Let me tell you, this template went together in no time flat!

Here's a look at the package alone:


See how the wrap ties together at the side? So pretty! I used some of the scraps from the wrap to cut out the stork's bag of baby goodness! Here's a close-up of the accompanying card:


Again, I used some scraps to decorate the buggy and card. I can't wait to fill this package with some baby goodies (think booties, or a couple of little toys, or baby bath....) and give it to a special someone who's having a girl in, oh, about 13 weeks!

Now be sure to hop around to the other design team member's blogs and see what other templates Lauren is releasing today - such fun goodies - you do not want to miss out!

  • Lauren Meader
  • Dawn Barwick
  • Debbie Marcinkiewicz
  • Farida Rone
  • Karien vab der Westhuizen
  • Kimberly Morrow
  • Lori Hairston
  • Lori Kalus
  • Mary Vogel - me!
  • Pattie Goldman
  • Romaine Rancier
  • Tracy Holmes
  • Wendy McGaffey

  • Oh and one other thing - be sure to check out this post at Lauren's blog. WalMart is possibly interested in carrying her line of templates!!  Check out the posted video and leave feedback - the more positive feedback WalMart receives, the more they might just move MTME into the market place!!

    Have a great day!

     photo myname.png

    7/2/13

    Year in Review - It's a Shower!

    Today's the last of the group posts for July's release at My Time Made Easy - have you checked out the new goodies yet?

    We're featuring older templates today because, while the new things are awesome, the "old" products are phenomenal too!! I've had showers on the brain lately (maybe because we've been having soooo much rain lately!) so I decided to work with It's a Shower template.


    I used cardstock and printed paper I already had in my stash and found some flowers that matched really well. I filled the umbrella with a combination of yellow/blue M&Ms and some gold foil wrapped candies. After wrapping everything in tulle, to keep the candy in place, I realized it's kind of hard to see the details of the umbrella clearly but I think you get the idea.


    This was a super easy template to put together and I think it would look awesome on the table at a bridal or baby shower.

    Thanks for visiting today and be sure to check out what the rest of the team created for our Year in Review!

  • Lauren Meader
  • Dawn Barwick
  • Farida Rone
  • Karien vab der Westhuizen
  • Kimberly Morrow
  • Lori Hairston
  • Lori Kalus
  • Mary Vogel - me
  • Pattie Goldman
  • Romaine Rancier
  • Tracy Holmes
  • Wendy McGaffey

  • See you again soon!

     photo myname.png

    7/1/13

    In-Dispensable Part 2

    Yay! It's release day at My Time Made Easy!  There's a great new template, beautiful new papers, a couple of cut files that make unique cards and a very versatile, must-have digital stamp set! Be sure to check out all the new goodies when you hop over to the shop!

    I have another In-Dispensable gift set for you today that I am so happy with - take a look:


    This time I used the lid piece on the template which includes this nice oval window cut out and scalloped edge. Isn't it pretty? I cut the base of my package in pink and the lid in white and then added the decorative Petal Prints paper to dress it all up. If you look really closely, you'll see the pink dots I added to the printed paper (using a Copic marker). I layered a piece of vellum over the oval window before adding my printed layer so there are no rough edges to be seen inside or out.

    Then when you open the box:


    Voila! A set of 4 cards - here's a view of the entire set:


    I used the new stamp set Just a Little Note and printed out 4 different phrases to use on my cards. I also cropped out a small section of a much larger image in the set so I had just a single flower with two leaves to work with. I printed this 4 times, color the image with Copics and then die cut them with an oval die. It's hard to see in the photo but the base of each card is dry embossed and then I simply added a strip of pink cardstock, my sentiments and the flower pieces and quickly had 4 cards ready to be packaged up.

    As a card maker, I gift a lot of cards to friends and family so this template will come in really handy for making a nice presentation. What will In-Dispensable inspire you to create?

    Be sure to check out what the rest of the team has in store and I'll be back tomorrow with an oldie but goodie!

  • Lauren Meader
  • Dawn Barwick
  • Farida Rone
  • Karien vab der Westhuizen
  • Kimberly Morrow
  • Lori Hairston
  • Lori Kalus
  • Mary Vogel - me
  • Pattie Goldman
  • Romaine Rancier
  • Tracy Holmes
  • Wendy McGaffey


  •  photo myname.png

    6/30/13

    In-Dispensable

    It's time for some new goodies from My Time Made Easy (releasing tomorrow, July 1st). Today I have a fun package using the new template, In-Dispensable. For this gift, I decided to make a couple of minor adjustments to the template - take a look at the project and then I'll tell you more.


    When I started putting In-Dispensable together, it reminded me of one of those boxes that hold candy bars that people bring to work to help their kids sell for school. Sound familiar? So I played off that idea and came up with a fun gift for a co-worker who recently got a promotion.

    I created the In-Dispensable template but left off the cover/lid piece. I also added a strip of printed paper (one of the prints in the Country Cakes Pretty Impressions Printables set) to the front edge of the package and one to the top edge. The rectangle of yellow cardstock at the back of the package is also an addition - I wanted something to hold the piece with the computer generated sentiment. No template needed for these pieces - just measure and cut rectangular pieces to fit.

    I filled the box with 100 Grand bars because, let's face it - if you got a promotion, that's what you want to start earning, I'm sure - multiple times over!

    So that's the first look I have for you of the new In-Dispensable template. I'll be back on the 1st with another sample - this time without the alterations. Meanwhile, be sure to visit my teammates for more indispensable ideas:

  • Lauren Meader
  • Dawn Barwick
  • Farida Rone
  • Karien vab der Westhuizen
  • Kimberly Morrow
  • Lori Hairston
  • Lori Kalus
  • Mary Vogel - me
  • Pattie Goldman
  • Romaine Rancier
  • Tracy Holmes
  • Wendy McGaffey

  • Enjoy your Sunday!

     photo myname.png

    6/1/13

    MTME Trendy Tool Tote


    I have another fun gift idea for you from My Time Made Easy, this time using another "older" template, Trendy Tool Tote.


    I cut the base for the tote from some rust colored cardstock and decorated up the panels with a printed paper from the new Tiny Town pack (the sides have decorative panels also). The tag was created using images from the new digi sets Home Sweet Home and There's No Place Like Home. I tied the tag on with some ribbon from my stash and added gardening gloves, a couple packages of bulbs and a lightweight spade. A simple inexpensive gift for the new homeowner!

    Be sure to check out what eye candy the rest of the team is treating you to today:

  • Lauren Meader
  • Dawn Barwick
  • Jackie Randolph
  • Karien vab der Westhuizen
  • Kimberly Morrow
  • Lisa Kind
  • Lori Hairston
  • Lori Kalus
  • Mary Vogel - me
  • Romaine Rancier
  • Tracy Holmes
  • Wendy McGaffey

  • That's it for me today. If you want to check out Are You on the Fence, I have a review of the new Dan Brown book, Inferno, posted. Have a beautiful Sunday and I'll be back again soon!

     photo myname.png

    MTME Release Day!


    I love My Time Made Easy release day! New goodies to play with!!  Today, I am pairing an older template with new paper and images -


    I used the Insert Card Here template and one of the new digi papers in the Tiny Town paper pack. I simply printed it on white heavy weight paper and highlighted one of the phrases with a little chalk to match the color of my mat. Now take a look at the inside:


    When you open the lid, up pops the gift card tucked inside - isn't that cool? And so easy to put together! I used images from the new Home Sweet Home stamp set and layered the sentiment over the house image. Matted with my green cardstock again and voila! Instant packaging - makes a great gift card presentation! And what new home owner couldn't use a Lowe's gift card?

    I'll be back again tomorrow with one more fun project but in the meantime, be sure you check out what the rest of the team has got up their crafty sleeves today. Wowsa!
    See you soon!

     photo myname.png

    5/31/13

    My Time Made Easy Sneak Peek

    It's almost release time again at My Time Made Easy and there is a great new template coming your way (plus other goodies!)

    Tapered Off is a fantastic sized gift box with many limitless possibilities. The many layers included allow you so many fun design options, including a "cap" topper to top off this fun tapered package! The way it unfolds open allows you many gift giving options as well! You can even add a window to the front and/or back.

    I imagined a building when I first saw this template and as it is the end of the school year in many places, I know teacher's gifts are a nice touch so I created a gift set for a wonderful teacher:


    First up, the Tapered Off template was turned into an adorable school house, with school themed paper from the Academic Hodge Podge paper set and the Construction Materials paper set (for the roof as well as the card background). I also used the Back to School Digital stamp set and printed out the school house and sentiment for my card. And to finish up the gift set, a quick easy apple made from An Apple a Day cut file - with a pencil as the stem. Cute, huh? I think any teacher would love a set like this!  You can add a few pieces of candy inside the apple and the Tapered Off template has enough room for a bottle (or 2) of bubble bath or lotion - just what a teacher needs to unwind when summer vacation kicks in!

    There's much more to see at the other designer's blogs so pop over to each one and say hello!

  • Lauren Meader
  • Jackie Randolph
  • Karien vab der Westhuizen
  • Kimberly Morrow
  • Lisa Kind
  • Lori Hairston
  • Lori Kalus
  • Mary Vogel  - me
  • Pattie Goldman
  • Tracy Holmes
  • Dawn Barwick
  • Romaine Rancier
  • Wendy McGaffey

  • Back tomorrow with another great gift idea!

    4/30/13

    My Time Made Easy - May Release

    If you're here for the May sneak peek and release for My Time Made Easy, I am sadly not participating this month due to other committments. Be sure to stop by Lauren's blog and hop through the rest of the design team's blogs, though, as you have a chance to win a free template! And this month's is a must-have!

    Be back with new things to share soon!

     photo myname.png

    4/4/13

    Sexy Soles - Wedding Style

    My last project for this month's My Time Made Easy release and I saved the best for last!

    As I mentioned before, this month's templates are all about fashion - a handbag, spiffy tennis shoe, shoe box and a little number called Sexy Soles. I went with a wedding theme as I think this would be an adorable decor piece at a personal bridal shower, for instance - or, if you feel ambitious, how about as favors?


    Actually, favors wouldn't be too bad as this template went together pretty quickly and easily. Kimberly (one of the other DT members) created an awesome video on how to assemble this template - I highly recommend it! You can find it here.

    Let me tell you a bit about my shoe. I used white cardstock - 1 12 x 12 sheet and 1 8 1/2 x 11 sheet. I cut all the pieces on my Cameo, then assembled everything and dressed it up with some floral trim details that I purchased at the fabric store. Here's a close up so you can see the embossing a little better:


    It's hard to tell from these photos but the sole was cut from a white shimmer cardstock so there's a little hint of shine. Makes it a little more wedding-y.

    That's it for this release - I hope you've enjoyed the projects! And if you haven't had a chance, be sure to check out what the rest of the team created - really beautiful samples this month! I'll be back with more this and that to share soon!


     photo myname.png

    4/1/13

    Alligator Bag

    It's release day at My Time Made Easy and I have another fabulously fashionable project to share with you! This was created from the Handbag template using one of the new Purse Patterns digi papers:


    Now I don't have a gift inside just yet but this bag is so roomy, I can fit a lot of goodies inside! I'm thinking about a couple wine coolers to share with a friend and maybe a munchie or two ;)

    I left off the optional pockets on my purse and added some metal accents and a row of black sequins to dress it all up. Very simple to assemble and I have a truly eye-catching presentation for someone special's gift!

    Be sure to visit the rest of the MTME DT and see what other awesome projects they have all created. And leave a warm welcome for our three new members: Romaine, Wendy and Dawn! I'm honored to be working with such an amazingly talented team!

    See you again soon with another My Time Made Easy project (another sexy one, for sure!)


     photo myname.png

    3/30/13

    A Shoe Basket?

    Time for sneak peaks of the upcoming release at My Time Made Easy and it's all about fashion! I created a last minute Easter package for my daughter, who has become quite a runner (since she lost all kinds of weight this past year!). Check out the Sole-Mate template in action:


    I wanted something feminine and as my daughter's running shoes are pink, I thought this would be perfect for her. And let me tell you - this is a generous sized package! The finished shoe measures approximately 8 1/2 inches long! You can put a lot of goodies in this sneaker!

    In addition to the template, there will also be new fashionable digi papers being released and a digi stamp set that includes adorable icons that can be printed and added to your shoe. I had intended to include one but ran out of printer ink right when I was down to crunch time! Bad planning on my part!

    Oh and to really step up this gift? Be sure to check out the Shoe Box template too! Imagine how cute this would be in a matching box? Adorable!

    I'll be back Monday (Release day!) with another creation- this time with something a little sexier :)

    Have a Happy Easter everyone!

     photo myname.png

    3/4/13

    Year in Review - MTME

    Today is the last day of posts for the March product release at My Time Made Easy and it's a fun day because we are all using various "older" products - we call it the Year in Review.

    I am combining something new with something old - in this case, the Love Birds digital stamp was just released on March 1st and I paired the image with an older template: Caged. Which I also took a few liberties with. Take a look:


    The Caged template creates a 4 sided cage but by leaving one side off, I was able to put my swinging Love Birds in the cage so they could be seen. There's no good way to capture movement in a photo but this image is actually dangling by fishing line from the top of the cage so the birdies do really swing back and forth. I added a flower to the top of the cage so I could hide the fishing line that is tied up at the top. The sentiment on the front of the cage was computer generated and added with a couple of pearl embellishments.

    I added some gift bag filler to the bottom of the cage (birds need a paper lining in their cage, no?) and can then tuck a gift card under the paper shreds to give to the happy couple.

    I hope you enjoyed this project and I know you will love what the rest of the team has in store for you! Be sure to stop by and visit the following:

  • Lauren Meader
  • Debbie Marcinkiewicz
  • Jackie Randolph
  • Karien vab der Westhuizen
  • Kimberly Morrow
  • Lisa Kind
  • Lori Hairston
  • Lori Kalus
  • Mary Vogel
  • Pattie Goldman
  • Tangii Crain
  • Tracy Holmes


  • Have a wonderful week and I will be back soon with more to share!


     photo myname.png

    3/3/13

    Gardening Display

    I'm back today with another fabulous template from My Time Made Easy. This one is simply called Display and it is so easy to create and sooo versatile! Here is what I decided to use the template for - a Spring gift for my Mom:


    Basically, Display is a box with a beautiful rounded back. The watering can is an image from a digi stamp set from MTME called Tending the Garden and the flowers on the can are from another digi set called Bold Botanicals. That's what I love about digital images - you can easily mix and match and create something that fits your needs! I colored the watering can in Photoshop but the flowers themselves are colored with Copics. The pretty flower paper is from a new digital paper pack as well, Spring Has Sprung.

    Here's another view so you can see the side of the Display package:


    Decorated all the way around! And all of the pieces to the template cut cleanly and fit perfectly so assembly is a breeze! Whether you have a Cricut or a Cameo, or even want to cut the pieces by hand, My Time Made Easy offers their templates in a variety of file formats to fit your needs (plus color step-by-step assembly directions - love!)

    In my Display I put 2 packages of summer bulbs and a pair of gardening gloves. My Mom still likes to plant flowers in her yard so these will be a little Spring treat for her.

    Don't forget to stop by the rest of the team who are showing more samples of the Display template as well as the Egg-stra Special template. Here are the people to stop by and see today:

    Lauren Meader
    Jackie Randolph
    Tracy Holmes

    And I'll be back again tomorrow with another "tweet" post for My Time Made Easy. See you then!


     photo myname.png

    3/1/13

    Egg-stra Special News and Easter Basket!

    I am so excited to share some crafty news with you! As the Pretty Palette challenges closed down this past week, I moved up to join the My Time Made Easy main Design Team!!! I am thrilled to be working with Lauren's templates every month as I have been in love with her products since she started her own business (and before, truthfully)! And my first assignment begins today and I have a cutey-cute-cute project to share with you but first some info from My Time Made Easy that you will not want to miss!


    Given the tough economy, we announced on Feb. 27th, that as of today, we have now decreased our prices by 20%!

    I may be a company owner, but I am really just like you. I'm a stay at home mom to 3 children, living on one primary income. I get to share what I love with the world and enjoy what I do. I KNOW how hard it can be to try to keep your family going, while maintaining your sanity through crafting, and be able to afford to buy some items without a lot of guilt! So after much debate I feel this change will help all our very valued customers :D  
                                                                               
                                                                                                             Lauren Meader
                                                                                                             My Time Made Easy

    How awesome is that? And after you see the adorable products being released in the store TODAY, you will want to take advantage of those savings and buy yourself some Spring-y goodies! And speaking of goodies, I bet you're ready to see my project - introducing Egg-stra Special!


    Now I couldn't just be normal and make the template the way it was supposed to be. See it's actual a complete egg, but I took a little liberty and used only the bottom half of the Egg-stra Special template. The paper is from the new digital paper pack Spring Has Sprung, which I printed on my inkjet printer. All of the template pieces were then cut on my Cameo. The handle is simply a 12 x 1.25 inch strip of cardstock, embellished with some crocheted trim.

    I also made a tag and flower embellishment to dress up my basket - take a closer peek:


    The image on the tag is one of the fun images in the Some Punny Easter digi stamp set, again printed and colored with a few Copics. I hand cut it out and layered it onto one of the cut pieces from the Egg-stra Special template and tied it to the basket handle. The flower was hand cut using the Fanciful Flowers cut file. I added a tied button to the center and a couple of crocheted trim "leaves" to finish it off and then filled my basket with gift bag filler (I couldn't find a good color Easter grass to use) and some little candies including two of my favorites - a Twix egg and a giant Peep! Swoon!

    The Egg-stra Special template creates a fairly large egg so you can add any number of goodies inside. The rest of the team is also posting artwork using either the Egg-stra Special template or another new template Display. Here is a list of all of the team members - be sure to hop around and check out their amazing artwork!

  • Lauren Meader
  • Debbie Marcinkiewicz
  • Jackie Randolph
  • Karien vab der Westhuizen
  • Kimberly Morrow
  • Lisa Kind
  • Lori Hairston
  • Lori Kalus
  • Mary Vogel - you're here!
  • Pattie Goldman
  • Tangii Crain
  • Tracy Holmes


  • That's it for me today. Thanks for stopping by and come back on Sunday when I have another project to share with you using the Display template from My Time Made Easy. Until then, have a great day!


     photo myname.png

    2/26/13

    Ten on Tuesday

    Lists are kinda my thing so today I bring you my recent life in list form.

    1. I locked my keys in my car yesterday when I stopped to get gas on my way home from work. I would have taken a picture to share but my phone was locked in the car too. After calling from the gas station phone, my hubby did rescue me about 20 minutes later.

    2. I took my son to school yesterday evening. I know that's not monumental but here's the thing...keep in mind he's in a wheelchair...I dropped him off and let him into the class building. Got back in my car. Two seconds later, an employee comes out of the building, flagging me down. I rolled my car window down and she says Jacob must have forgotten something because she heard him say "Crap" and then started heading toward the door. Forgotten something? I don't think so. I head back in the building and he tells me I dropped him off at the wrong building. Class is across campus. My fault....or his?

    3. Picked up some Vitamin B complex to start taking for....? I don't remember why I should start taking it. I hope it's to help my memory. Then maybe I won't drop my son off at the wrong building any more.

    4. I'm in redecorating mode in my house. The kitchen theme of apples is gone and is now replaced with coffee decor. Not sure why as I am not a coffee drinker but I like the look of it.

    5. I have also gotten some new items to replace some older, tired items in the living room and dining room. It feels like a new house. Not really but I can pretend.

    6. Another winter storm is moving through later today. Rain turning to freezing rain turning to snow. #imoverwinteralready.

    7. Of course, tomorrow is my day off and I have plans to leave the house. Old man winter might be changing all that.

    8. Remember I mentioned a week or so ago that my dog hurts her leg/hip/back? Well, she seems to be good as new. Thought you might like an update.

    9. I am in vacation planning mode. We are taking a week and driving to Florida to go to Universal Studios. Really looking forward to Harry Potter world! Not really looking forward to 18 hours in the car each way.

    10. Finally, I have a card to share that should have been posted last week but I forgot. See #3. This is the last of the cards I will be making for the Pretty Palette Challenges as the challenges are closing :( But I do have some good news to share starting Friday so more then! Our colors for this last challenge were pink, rose, yellow and green - perfect for this adorable dragon!

    I can't picture him being the fire-breathing type, can you? All products are from My Time Made Easy (except ribbon).

    That wraps it up for me today. See you again soon!

     photo myname.png

    2/7/13

    National Cherry Month


    Well, January turned out to be the sick month for me and now I'm bound and determined to make February the blog month. Meaning I will hopefully be blogging a lot to make up for all the blogging I didn't do last month. I spent last month coughing.

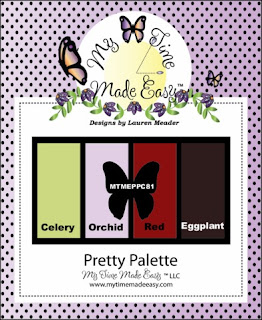
    Today it's Pretty Palette challenge day once again. Here is the palette we're working with:


    I really focused on the celery and red colors (and was thinking about the last piece of cherry crumb pie we had in the house) so this card was born:


    For a change from my ordinary card-making routine, I colored the image with colored pencils this time rather than Copics. And as I couldn't find a scrap of cardstock to match any of the stripe colors in the patterned paper, I decided to mat with white. It's hard to see in the photo but the image, printed on white, is also matted on a different shape of white. Added a nice touch of dimension without being overwhelming. I think I should have included a sentiment of some sort on the front but couldn't decide what I wanted it to say so for now, it's blank until I go to mail it out - then I will add a little something like "life is a bowl of cherries" or "wishing you a great birthday with a cherry on top".

    Anyhow, I hope you'll pop over to the Pretty Palette challenge and check out my teammates' great samples and then play along with us! I think these colors would be great for Valentine's Day too and that's just around the corner!!

    I'll be back soon with more goodies to share. Have a great day!

     photo myname.png

    1/24/13

    Pets leave pawprints

    Every once in awhile, a card is needed for a sad occasion, in this case, the passing of a dearly beloved pet. If you're not a pet person, you might not "get it" but for those with pets, you know what a part of your family they are and how heartbreaking it is when we have to say goodbye.

    This week's card, made using the colors from the Pretty Palette challenge, is for someone who recently lost their furry friend. The image and sentiment is from My Time Made Easy as well as the digital printed paper. (See links to products below).


    Our colors this week are Aqua (not in my card), Blue, Kraft and Lt. Brown (although I opted for a darker brown but that's ok - the palette is just to get you inspired!) The heart border was die-cut and embossed for some texture. The striped paper and image again was computer printed digi products. So easy and says exactly the message that needs to be relayed.

    I hope you will consider playing along with our color challenge and sharing your wonderful creations. Be back again soon with more artwork and some catching up on life in general.

    Images - Pawsitively Sweet
    Paper - Cool Romance
    Cardstock - Papertrey Ink and Close To My Heart
    Embossing folder - Cuttlebug
    Die-cuts - Nestabilities and Papertrey Ink

    1/10/13

    Pretty Palette Challenge

    It's time for another Pretty Palette challenge and this time, I had to put my Cameo to work (did I mention how much I love this machine??) Anyhow, our colors are Light Green, Purple and Aqua. The color palette was chosen from the Un-Wined Vinyard digi paper pack at My Time Made Easy. So I teamed up some of the paper with an MTME template, In a Pinch and the digi stamp set Vintage Vinyard to make this:


    This package holds two glass wine bottle stoppers that will be a gift for someone special. It's the perfect size! I cut the box out using the Cameo and then cut the pieces of printed paper to fit the panels. The image (which is not very clear in this photo - I didn't notice that last night when I was getting the photo ready - sorry!) was print on my printer and cut out with the Cameo as well - love that feature! No more fussy cutting for me! I colored it with a few Copics and then finished everything off with some ribbon and a flower (also Copic colored to match).

    I hope you will pop over and see what the rest of the team created using these colors - sooo pretty! And then join us! You can make anything using products from any company as long as you use our color palette! But with everything My Time Made Easy has to offer, be sure to check out their store too! (The January release is phenomenal!)

    See you again soon!

    12/27/12

    Table for Two

    This week's Pretty Palette challenge features colors that can be found in the Table for Two paper pack at My Time Made Easy. The colors are Gray, Green, Orchid and Burgundy. I used three of the four and created a simple thank you card:


    The paper was printed on my ink jet printer as was the sentiment (from the Table for Two sentiments set). I die cut the sentiment with an oval Nestabilities die and created the mat under it with another Nesties die. Then a satin orchid bow and this card is ready to go! We has so many good meals this holiday season that I have a few people to thank :)

    I hope you will check out our challenge and play along! Remember, you have 2 weeks to join in the fun and while we would love for you to use MTME products, it's not a requirement so pop over and check us out!

    See you again soon!